By far, the biggest and most important event in the North Pittsburgh Stake for 2022 is also the one that members are least involved in—namely, the construction of the Pittsburgh temple.
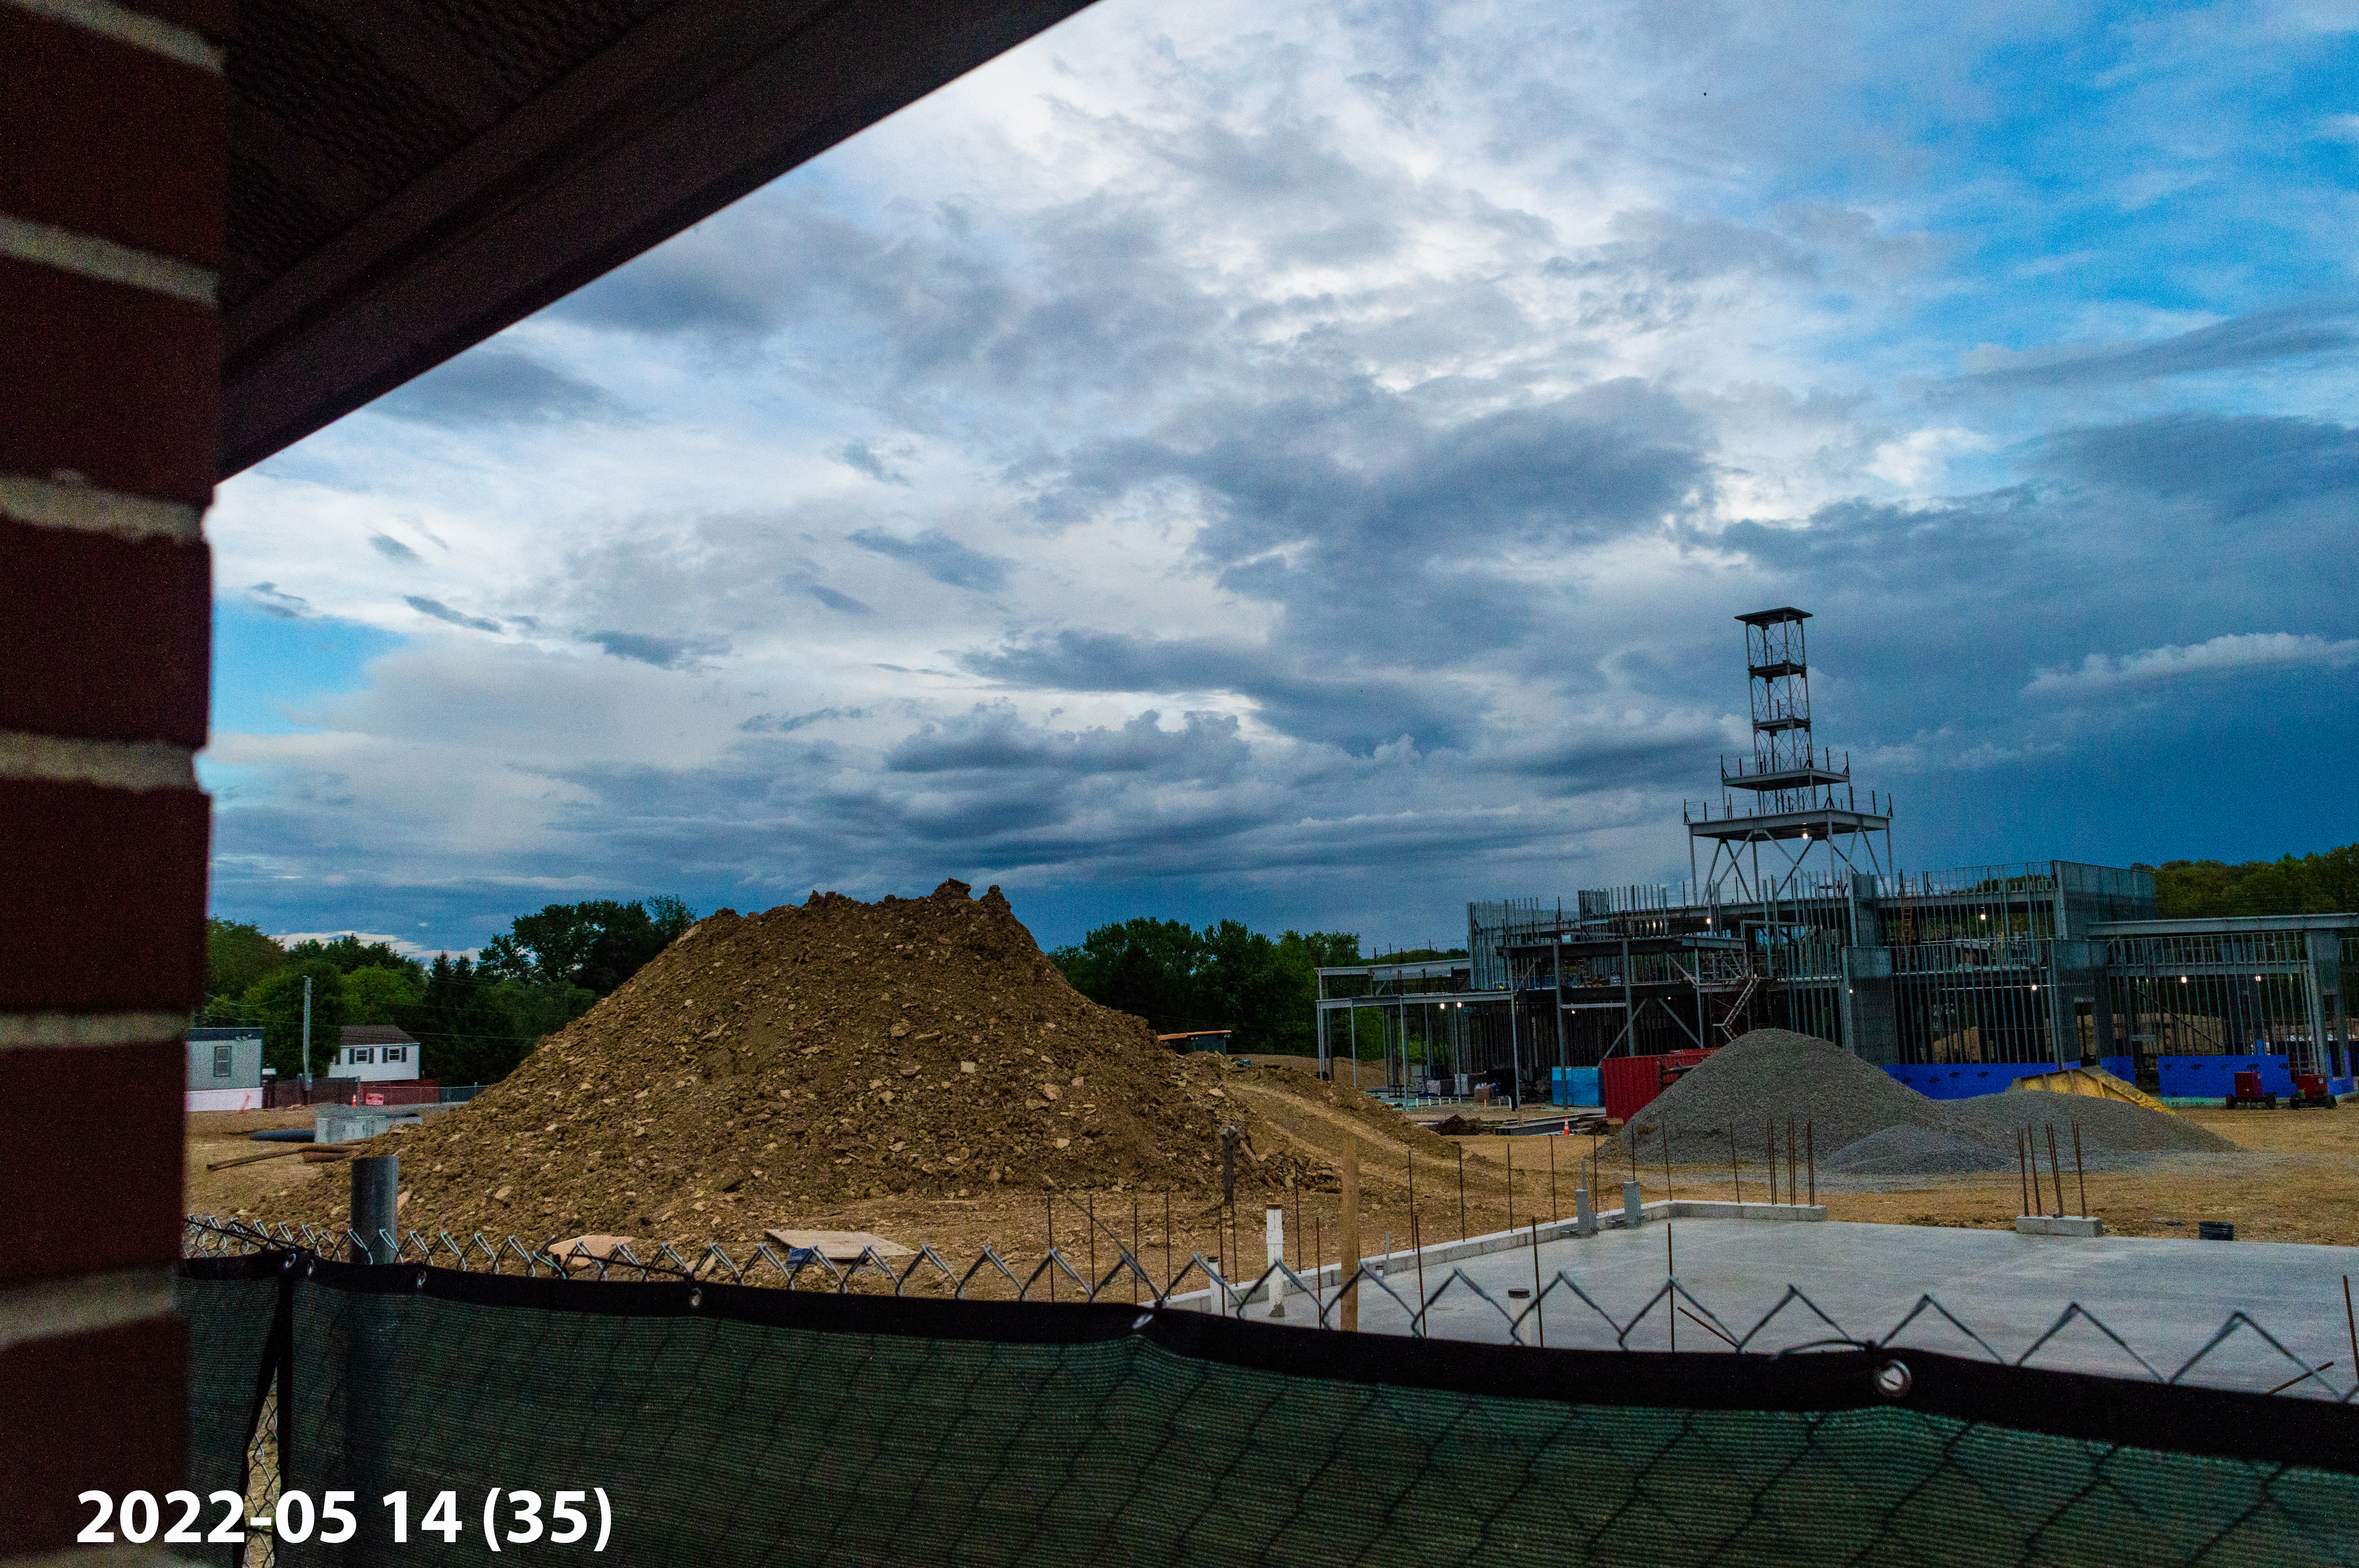
January 2022, Pittsburgh Temple Construction site
Gone are the days when members put their physical strength into the construction of the mightiest and most significant buildings on earth. Today, buildings are highly technical creations and workers must be highly trained. To bad that the workers who get this privilege don’t understand the significance of what they are doing. For that matter, I don’t fully understand the significance of the temple, but I know this is a really big deal.
January 2023, Pittsburgh Temple Construction site
If you sit in the Cranberry parking lot for any significant time, almost surely, someone will pull in, stop, take a few photos and drive on. I saw this on multiple occasions when I was there taking pictures.
Or you might meet an old friend from another stake. In this case, my former Stake President Brennen Murray and his wife, Kimberly.
I love to see the temple site when the clouds are black and turbulent. It reminds me of what Vaught Featherston said, “As the evil night darkens upon this generation, we must COME TO THE TEMPLE FOR LIGHT AND SAFETY. In our temples we find quiet, sacred havens where the storms cannot penetrate to us. There are hosts of unseen sentinels watching over and guarding our temples. Angels attend every door. As it was in the days of Elisha so it will be for us, “they that be with us are more than they that be with them” (2Kings 6:16).”
One day I went extra early, while it was dark, just so I could watch the first rays of morning strike the stop of the temple.
I was not disappointed.
In July, workers started covering the frame
The Cranberry Stake building is beautiful but it will soon be overshadowed by the temple and that’s the way it should be.
My telephoto lens won’t let me see what is happening inside. I wish I had x-ray vision like Superman.
Several years ago, Pittsburgh had some terrible weather, the type that knocks down trees, washes out roads and destroys houses. In some areas, power was out for days. Our family made it through without much trouble. We were the lucky ones.
Several miles from our home, who I will call Kelli and her family were away on vacation, so they didn’t see the devastation. When they did get home, they discovered the culvert in front of their house had become clogged and all the run-off water that normally went past their house had been running through the lower half of the house.
I remember as a kid, thinking that a flood would be fun. Just have a small boat or raft, wait for the water to come and lift you up. Then I saw a movie that showed a real flood. It isn’t water coming-it was a wall of churning debris. The water is filthy. Think of it as sewage. When the water has gone, it leaves a thick layer of fine dirt which has penetrated every crack. Nasty stuff.
An automobile that has been submerged is considered unsalvageable. A washing machine, lawn mower, anything with bearings or a gear box can only be recovered if it is disassembled down to its basic components, washed, dried and lubricated in a very short time-we’re talking hours-not days.
Some things do survive flooding. Refrigerators and freezers are sealed units. They do remarkably well. Plastic, kitchen ware and clothing can be recovered.
Now remember, Kelli and her family had been on vacation. Everything had been under water for a couple of days before they even knew about the problem. To add to the trouble, Kelli didn’t have flood insurance and was not independently wealthy. The community itself was low income, and Kelli was one of many in trouble. The Mayor took out the yellow pages, turned to the section with churches and started down the list.
That’s when our church learned about Kelli. After our worship service on Sunday, many members of our congregation were told to go home, put on their “grubbies” and come back to help. We rinsed off clothes, furniture and appliances with a garden hose, shoveled mud, busted out soaked dry wall.
I found Kelli and asked, “Do you have damaged photographs?” I had just read a book called How to Save Your Stuff from a Disaster, by Scott M. Haskins. It had a lot of neat ideas and I wanted to try them out.
She nodded sadly and said, “We threw them all out.”
Then I said, in my usual tactless way, “Too bad. They could have been saved.” At that moment, I believe I doubled her feelings of loss. Clothes, furniture and appliances can be replaced. That only takes money, but each photograph is unique and is irreplaceable.
Fortunately, the photos had not been thrown far and I was able to gather many of them. In the next few weeks, I recovered more than 400 of them.
Photos Versus Water
Photographs are processed in water, so being wet doesn’t automatically mean they are destroyed. I knew that from when I ran my own darkroom. Once, I left one of my prints in a jar of water. After a few days, the emulsion (the chemical coating on the paper) came unstuck. I was able to lift the paper out of the jar but leave the image suspended in the water.
Over the years photography has improved. However, many of the principles are the same. Recently, I experimented with some modern color photographs and found that some start to deteriorate after about two days. The surface of the print starts to look dull. This means the chemical coating on the paper is starting to break down. On the third day, the photo started to develop little red spots. The spots got larger and changed color to a bright yellow. Finally the whole picture turned white when the image was completely gone.
Then there were some other photos that were unaffected by immersion for one week. So there is no guideline to tell you how much time you have. Best to “err on the side of caution” and recover them as quickly as possible.
How it was done
It’s the long exposure to water, plus the effects of dirt, chemicals, mildew and decay that determine the fate of a flood-damaged photo. The flooding had happened on a Thursday night and I was trying to recover them on a Sunday, three days later. I gathered up as many of the photos as I could find, put them in a plastic tub and drove away, after advising Kelli that if they found any more photos, they should rinse them and then store them wet inside the freezer.
Cleaning the Pictures
I placed the pictures in a tub of water and gently washed them by rocking the tub and by dipping them in and out of the clean water. Knowing how fragile each photo can be, I held it very carefully by an edge or corner. Then I laid it in a 9” x 13” pan and covered it with a piece of wax paper, and went for the next one. This wasn’t a fancy cleaning job, just something to get the dirt off. When the water was dirty, I changed it. I did this as quickly as possible because the longer I took, the softer the image became.
Preserving the Pictures
There were a lot of photos and I didn’t have time to dry them all at once, so when the cake pan was full I put it in a freezer. This was to stop further damage from the water and any mildew. By the end of the day, I had five of these pans in our freezer. Now, with further damage to the photo stopped, I could take my time in doing the next part of the recovery and I could do it at a time of my choosing. I wasn’t worried about getting the picture back to Kelly quickly. She had her hands full of other things.
Drying the Photos
When professional photo services want a nice glossy print, they use special equipment to dry the prints. Of course, I didn’t have that. After thawing some pictures and discarding the wax paper, I laid some of them face up on a water safe surface. Others, I hung on a temporary clothesline in the garage. I dried them overnight. The next day, I took more photos out of the freezer, washed and dried them.
Lessons Learned
Many of the photos had been stored in stacks. This was both good and bad. Since they were stacked, the water didn’t penetrate each photo and this helped preserve them, but it also meant they were stuck together. I didn’t try to pull them apart. That would have destroyed the image. Instead, I soaked them in my clean water until they came unstuck, usually less than an hour.
Most of the photos recovered well. But some of the recovered photos had a very interesting appearance, a red and yellow border, because those portions were exposed to water for a long time. Considering what they had been through, it was a wonder that there wasn’t more damage.
I learned that Polaroid photos may be washed but should not be soaked. They are made of two layers of plastic with some special chemicals sandwiched between them. These chemicals absorbed water to make a thick jelly. I had to peel apart the layers, wash away the chemicals, and glue the top layer to acid free paper with acid free glue. Fortunately, there were only a few of them.
The Return Visit
Even weeks later, Kelli’s house was in chaos. The house had electricity and a new furnace. All the dry wall had to be replaced. The washing machine and dryer were damaged beyond repair. There was furniture stacked in her yard, covered with tarps, along with a sign warning scavengers that “This is not junk.”
I knew it would be months before things returned to “normal”, so I didn’t hurry to return the salvaged photos. When I did return them, the family was very glad that I had been able to save their photos. I was pleased that what I had read worked so well. I did receive a reward for my services. The family brought from the freezer some more photos, all carefully frozen and ready for recovery.
Additional Information
The American Institute for Conservation of Historic and Artistic Works (AIC) Library of Congress